
Customisation Templates
Customisation templates specify which styling is applied to the master widget and all child widgets rendered within the master widget.
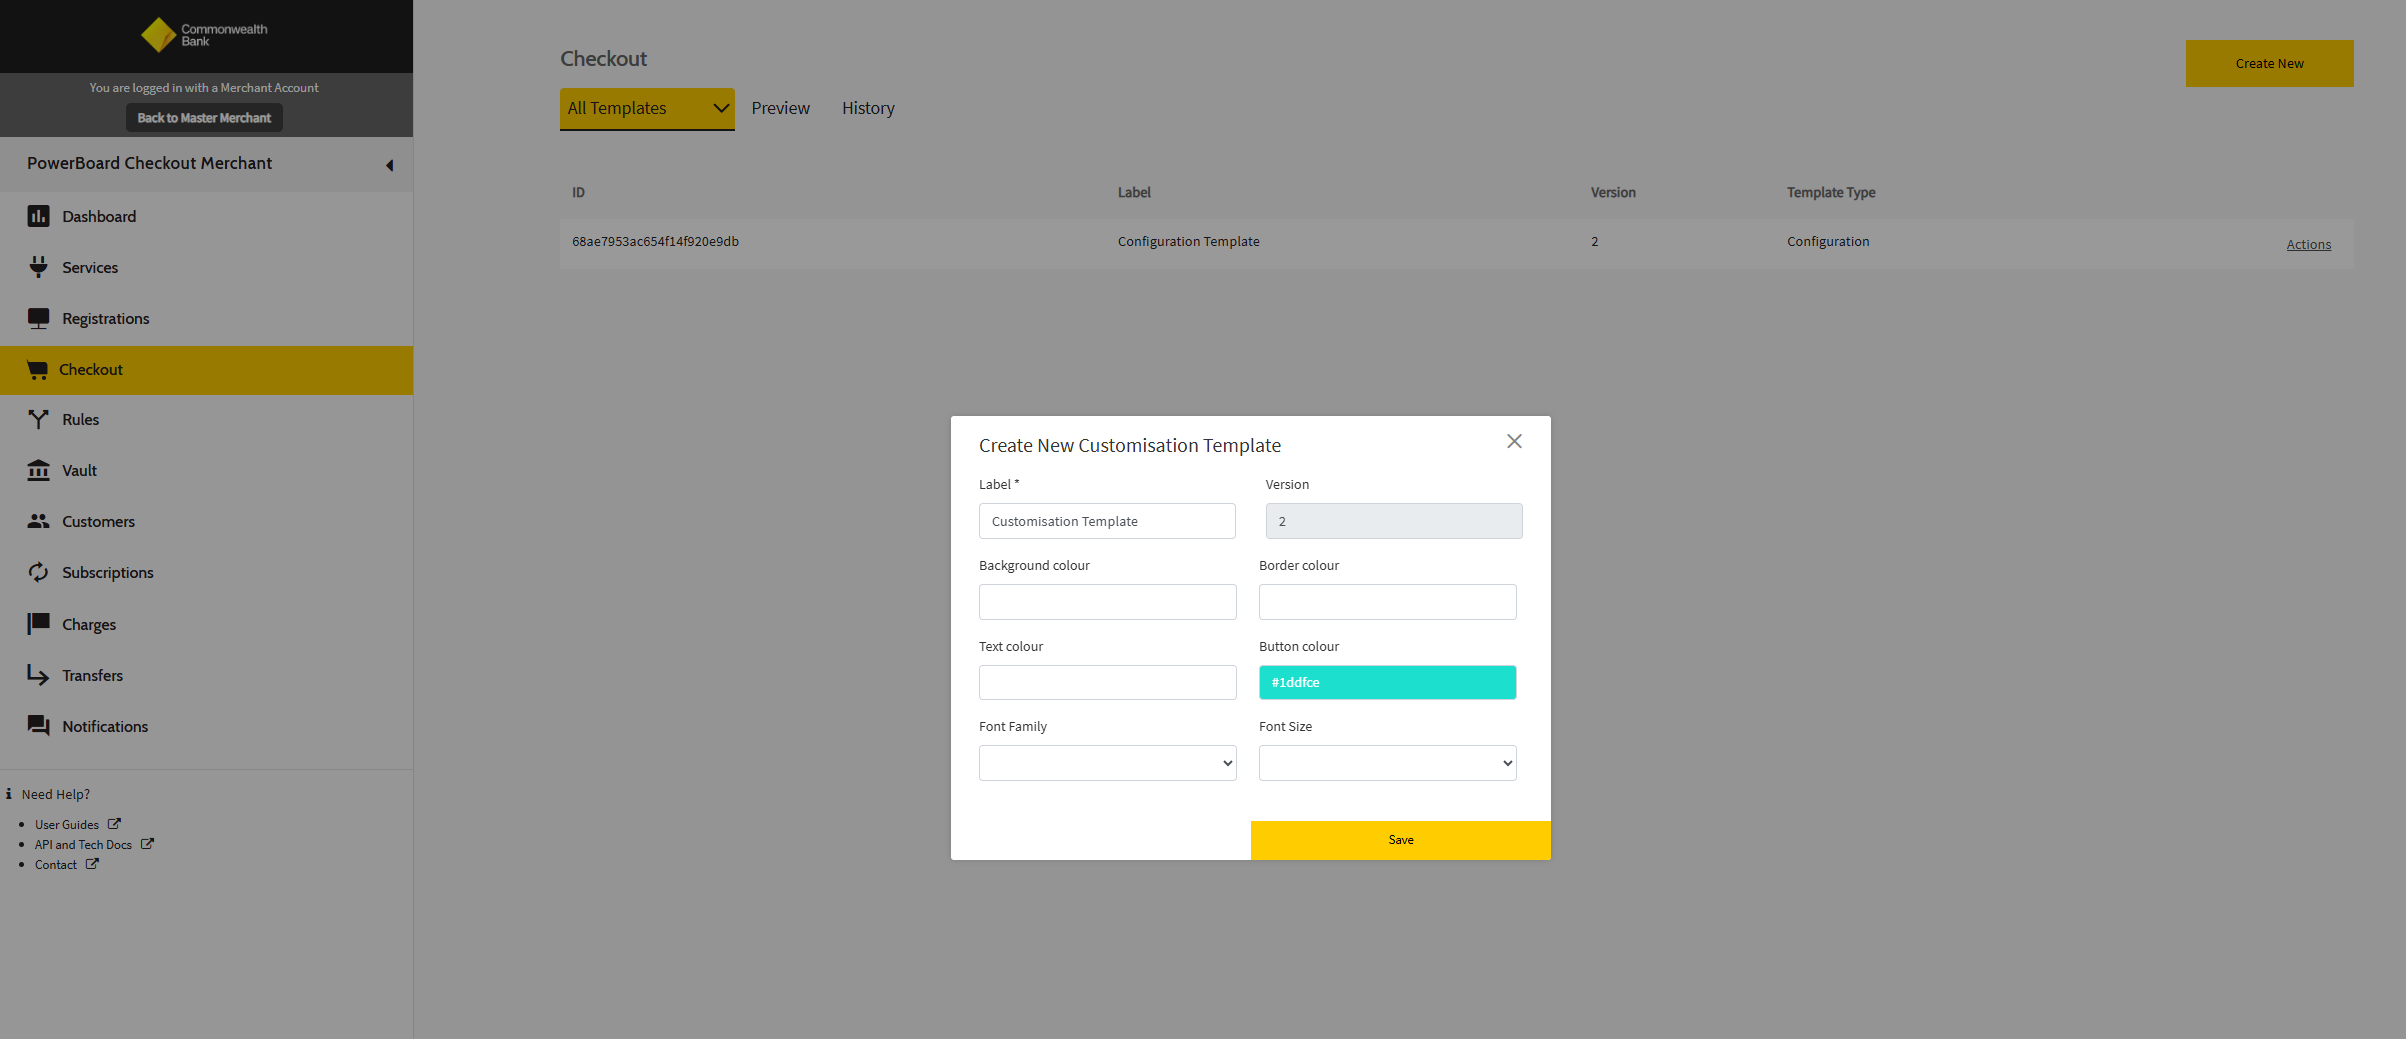
Creating a Customisation Template
Step 1: Template Setup
Assign a clear and descriptive label to your customisation template. While the system doesn't enforce uniqueness, using distinct names will help you easily identify different configurations (e.g., "Standard Customisation Template v2").
The latest template version will be automatically pre-selected during creation.
Step 2: Configure Customisation Options
The options on the customisation template are as follows:
Colours
Colours can be customised based on the colour picker that is displayed for:
- Background colour
- Border colour
- Text colour
- Button colour
Fonts
The fonts can be customised based on:
- Font family (picklist is displayed for available font families)
- Font size (14-20px)
Important Notes
Note: Customisation template is optional. If the merchant does not provide a customisation template in the intent API request, then the default settings will be applied.
If a user wants to create a customisation template, then at least one of the above options in the customisation template must be filled out for the 'save' button to be enabled on the UI.
Updated 3 months ago