
Configuration Templates
Configuration templates specify which payment methods and payment flows are presented to the end card holder.
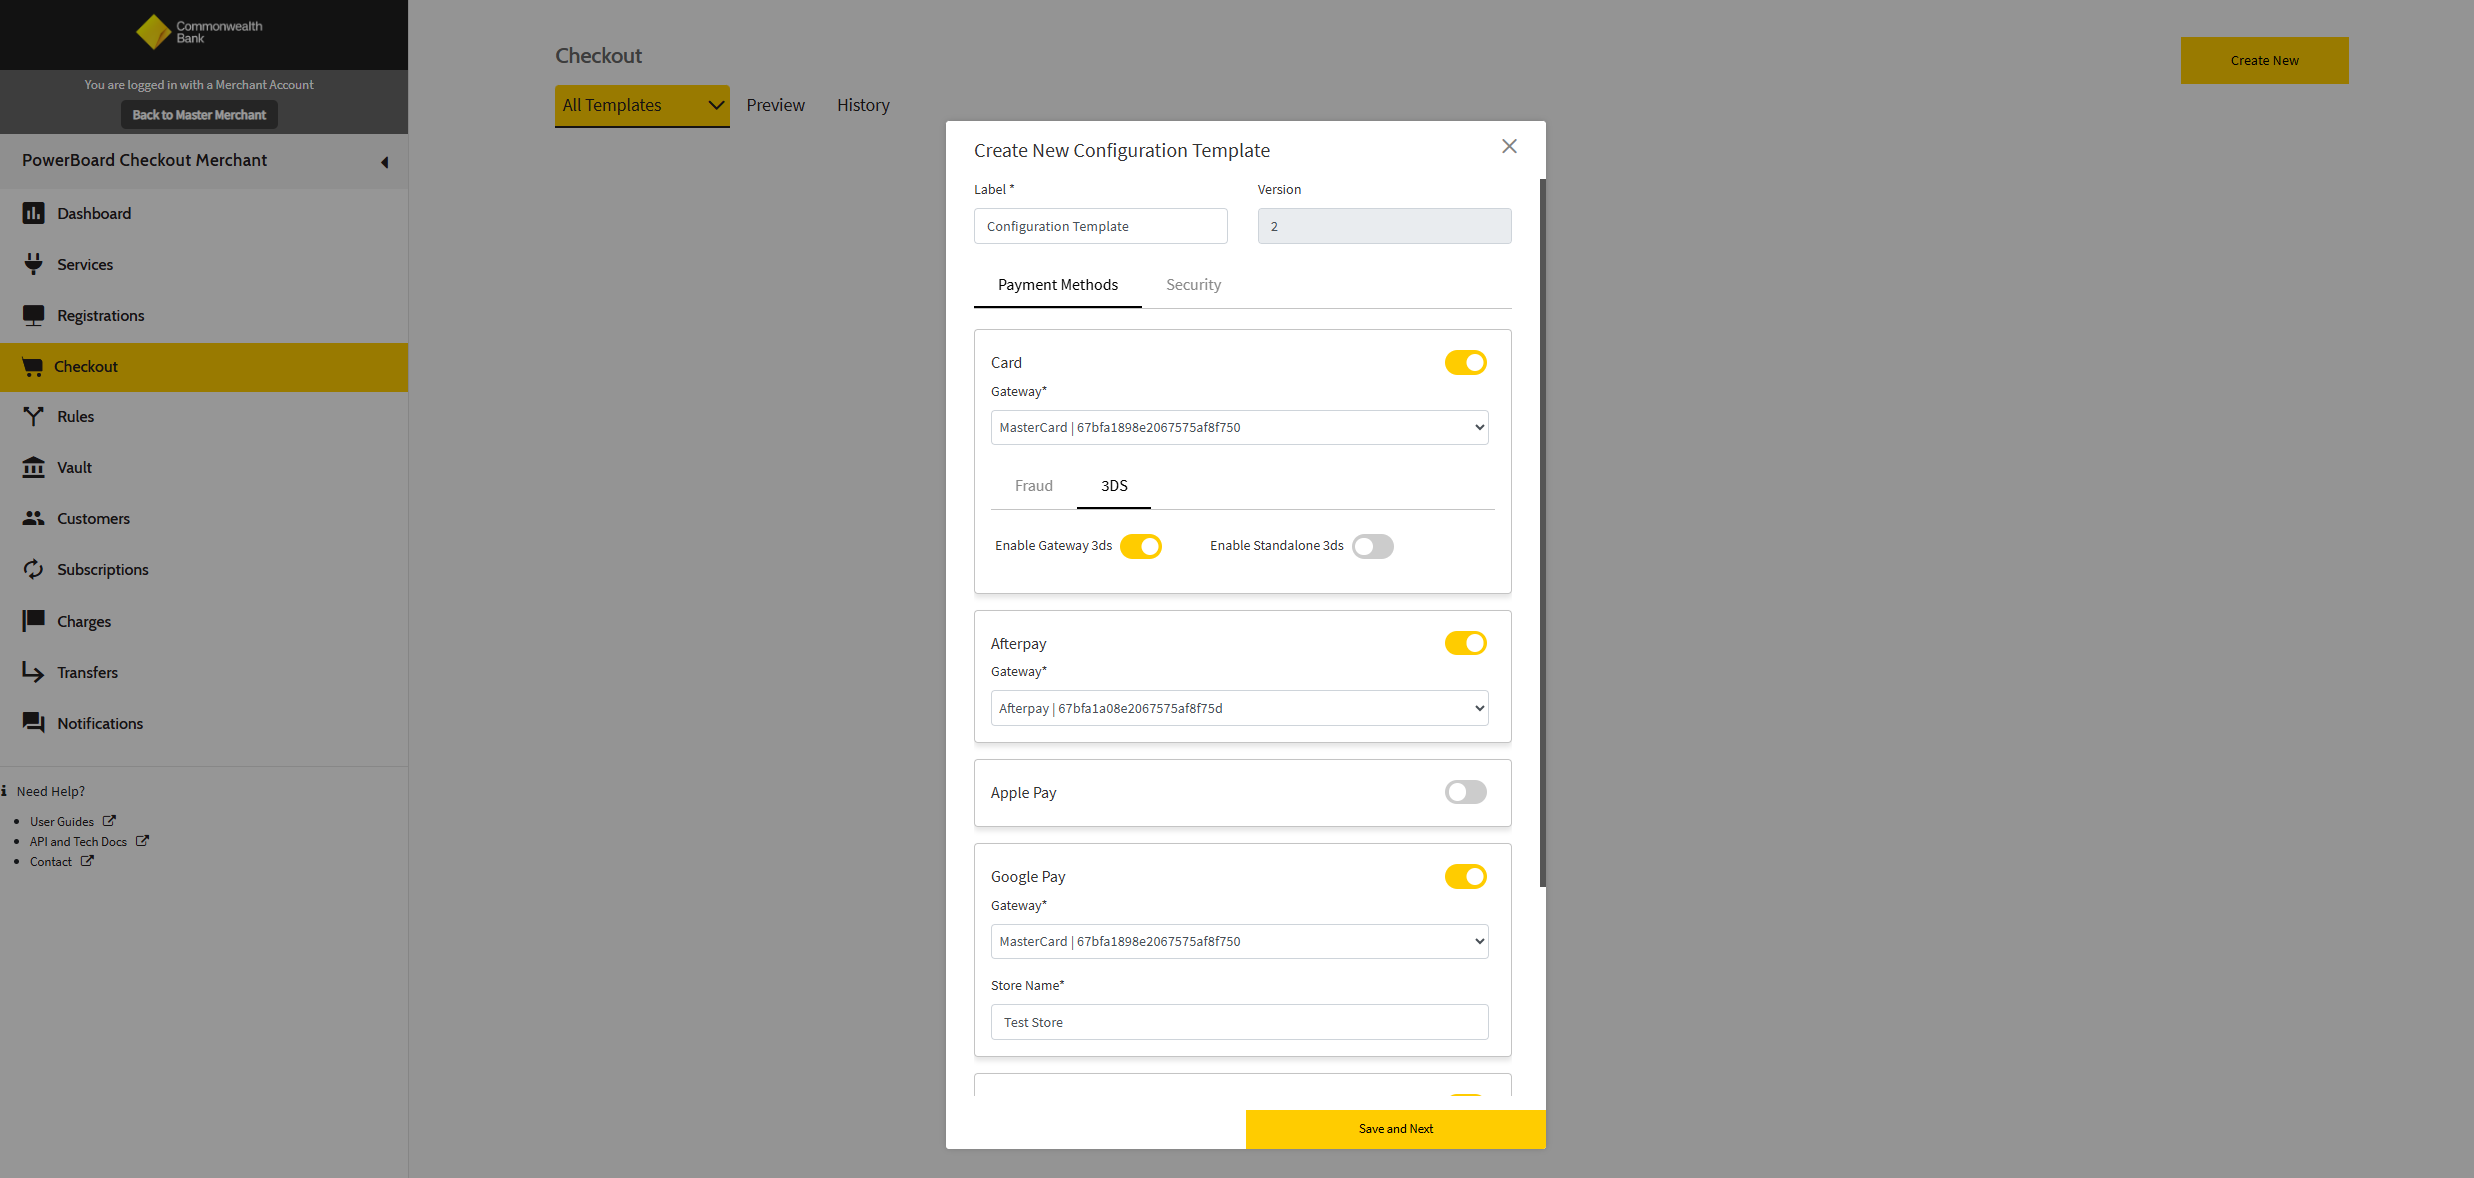
Creating a Configuration Template
Step 1: Template Setup
Assign a clear and descriptive label to your template. While the label field isn't enforced for uniqueness, using distinct labels will help you easily identify different configurations.
Note:The latest template version will be automatically pre-selected during creation. The reason for this is to ensure that you are keeping up to date with our latest software versions, providing you with increased functionality.
Step 2: Configure Payment Methods
For each payment method you wish to enable, use the provided toggles to select the supported flows:
Card Payment Method Options
Enable Card Payment Method: Toggling this on enables the default "direct capture" flow for card payments. This is mandatory if you want to enable card payment acceptance.
Enable Fraud Prevention (Accertify): In the Fraud tab, optionally activate the Enable Standalone Fraud toggle. This allows you to incorporate Accertify for fraud prevention.
Include Gateway 3DS Authentication (MPGS): In the 3DS tab, optionally activate the Enable Gateway 3DS toggle.
Note: This option is only applicable when MPGS is selected as your card payment gateway.
Combined Fraud and 3DS Flows: If you enable both a fraud toggle (Accertify) and a 3DS toggle (in-built MPGS), the system will seamlessly combine these checks.
Note: The processing sequence of flow operations will be:
- Fraud check first. Provided fraud check passes, it will be followed by:
- 3DS authentication. Provided 3DS check passes, it will followed by:
- Financial charge
Other Payment Methods
For all other payment methods, the "direct capture" flow is the only option supported for now.
Step 3: Select Gateways
For each flow you want to enable, the system will fetch a list of compatible gateway types and populate them in a dropdown list in the format: 'gateway_label' | ' 'gateway_id'
Step 4: Configure URL Validation (Optional)
For each configuration template, you can choose to set up URL validation to whitelist domains for Checkout Master Widget access.
This enforces domain-level security and specifies a whitelist of authorised domains where checkout can be accessed. If an intent request comes from a non-whitelisted domain, it is blocked, preventing unauthorised embedding and reducing fraud risks.
To configure URL validation:
-
Navigate to the 'Security' tab and add the origin URL to the 'Whitelist Domains' field to restrict checkout access to specific domains.
-
You must enter the full domain name to whitelist it. For example, if you want to allow
test.test.com, please enter the exact full URL domain -test.test.com, not justtest.com. Additionally, the whitelisting supports multiple formats, so you can add domains in any style, such astest.comorhttps://test.com. -
If you don't configure a domain whitelisting, Master Widget will be accessible from any domain by default.
Updated 3 months ago