
Access Tokens
In this article, we will explore the topic of access tokens in more detail, including how to create new tokens, deactivate old ones and whitelist IPs.
Add New Access Tokens
Access tokens are used in token-based authentication to allow users access to your account’s API or PowerBoard by gathering and providing the required security data for clearance. Permissions are granted for defined functions and periods and can be deactivated when no longer needed.
How an access token works: users log in to a system. It passes the access token as a credential when it calls the target API or PowerBoard component. The token notifies that the user is authorised to access and perform certain actions.
To generate a new Access Token:
- Go to Profile menu > Access Tokens > Create New.
- Select the required permissions, give the Access Token a name in the Label field and set the expiry date and time under Expire In. Leave the field blank if you wish the Access Token to remain active indefinitely.
- Additionally, you can allow user access tokens only with specified domain names (for UI only) and from specified IP addresses (for both API and UI). You can add these parameters to the Whitelist Domains and Whitelist IPs fields.
- Click Create.
- Copy and share the Token as it will not be available on the PowerBoard afterwards.

Deactivate Access Tokens
To disable an Access Token:
- Go to Profile menu > Access Tokens.
- Click on Actions > Deactivate > Deactivate Permanently (no expiry date) for the specified Token.
OR
Click on Deactivate under Recent Authentications to deactivate the specific login Token generated by the system (automatic expiry in 3 hours).

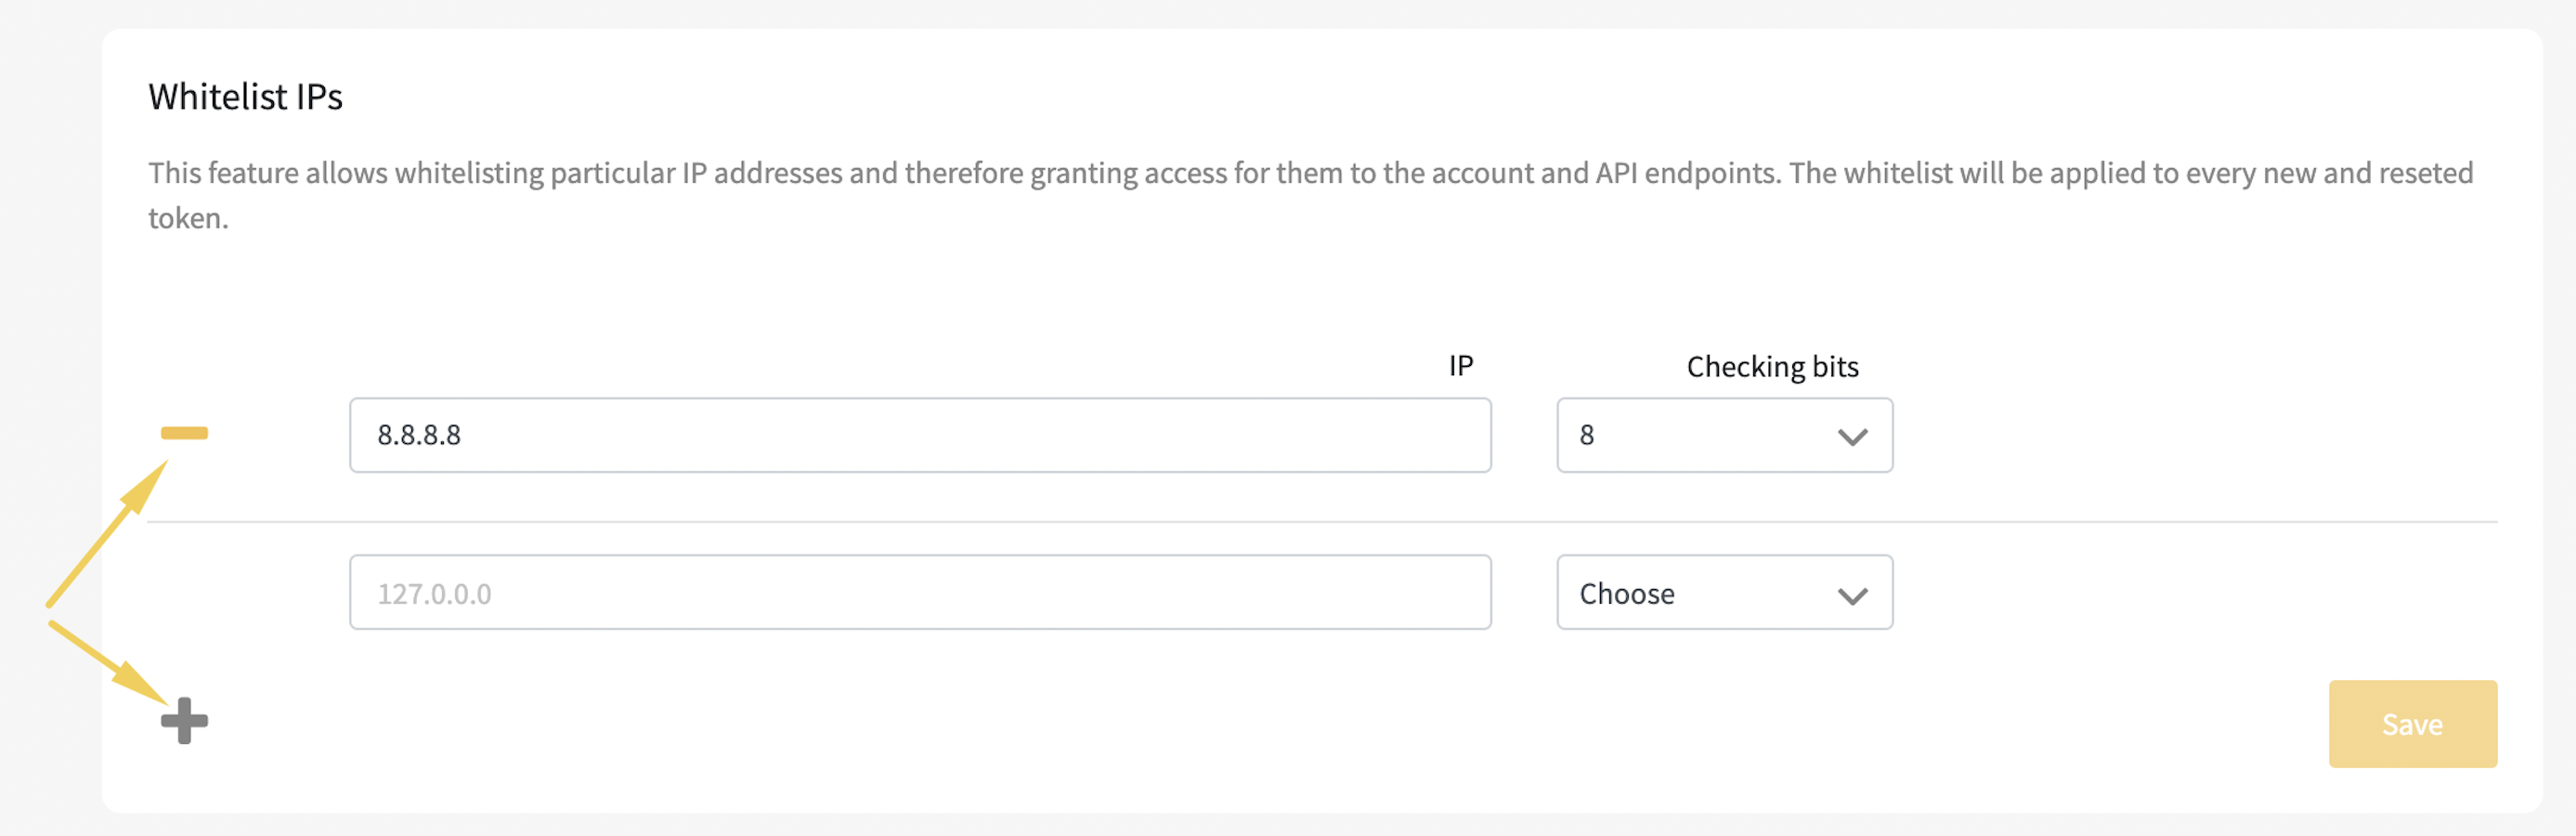
Whitelist IPs
An internet protocol (IP) address is a unique identifier showing the device and network users operate to access the internet. IP whitelisting grants access only to specific addresses. If the IPs are not present in the allowlist, but the user enters the correct username and password, their request to log in will be rejected.
To whitelist IPs:
- Go to Profile menu > My Company > Security.
- Enter the IP address and choose one of the Checking bits options, i.e. the number of bits that will be checked in this IP address. Every part separated by a dot equals 8 bits.

- Click Save.
- Click + sign to add or - sign to remove an unlimited number of IP addresses.
NoteWe do not recommend IP allowlisting if your company relies on Virtual Private Networks (VPNs) or varying IP location add-ons.
FAQs
Unfortunately you cannot retrieve the access token as it will not be available on the PowerBoard afterwards. You will need to deactivate the access token and create a new one.
Unfortunately you will need to add users one at a time and assign their roles individually.
Yes! The invitation link expires after 72 hours. Clicking on the link in
invitation email after 72 hours loads the page with “This invitation
link is broken. Please contact your system administrator”
Administrator has to resend the invitation by following this
link.
Updated 3 months ago