
Vault
Tokenisation with the Vault
Overview
By using Vault Tokens to store a Customer’s card details, you can securely recharge these payment methods in the future. Our API suite provides the ability to associate certain vault tokens with other parameters, such as a Customer or a specific Payment Service Provider. This allows you to strengthen your business relationships with Payment Service Providers and improve reporting accuracy.
Tokens are created within the Vault whenever you create a new Customer (refer to the Customers User Guide for more detail). The raw financial data is securely stored within a controlled and compliant environment and replaced in your Dashboard with an encrypted Token, which can only be used in conjunction with your unique API Secret Key. The token is a random, encrypted combination of numbers and letters, which will be accessible from your Dashboard.
Working with Tokenisation
Tokenising Payment Methods happens seamlessly, however if you are intending to interact with these tokens once they are created, it’s helpful to understand that:
-
Any Subscriptions that are running on old payment sources should be updated to the new Payment Source. Please refer to the User Guide for Subscriptions for more detail on how to do this.
-
A new Payment Source will be assigned automatically as the customer’s default payment source. Please refer to the User Guide for Customers to learn how you can change a default Payment Source.
Importing Tokens
You can import Tokens from your existing Payment Service Providers so you can continue to charge existing Customers without any interruption to your business. Doing so will automatically associate these tokens with a certain Payment Service Provider. This process can take some time to execute, so please contact your Relationship Manager for assistance.
Associating Payment Sources with Tokens
When you create a Vault Token for the first time it does not need to be associated with a Customer
or a Payment Service Provider. However, we do recommend passing this information through when
creating new Tokens to help with reporting and tracking activity on your account.
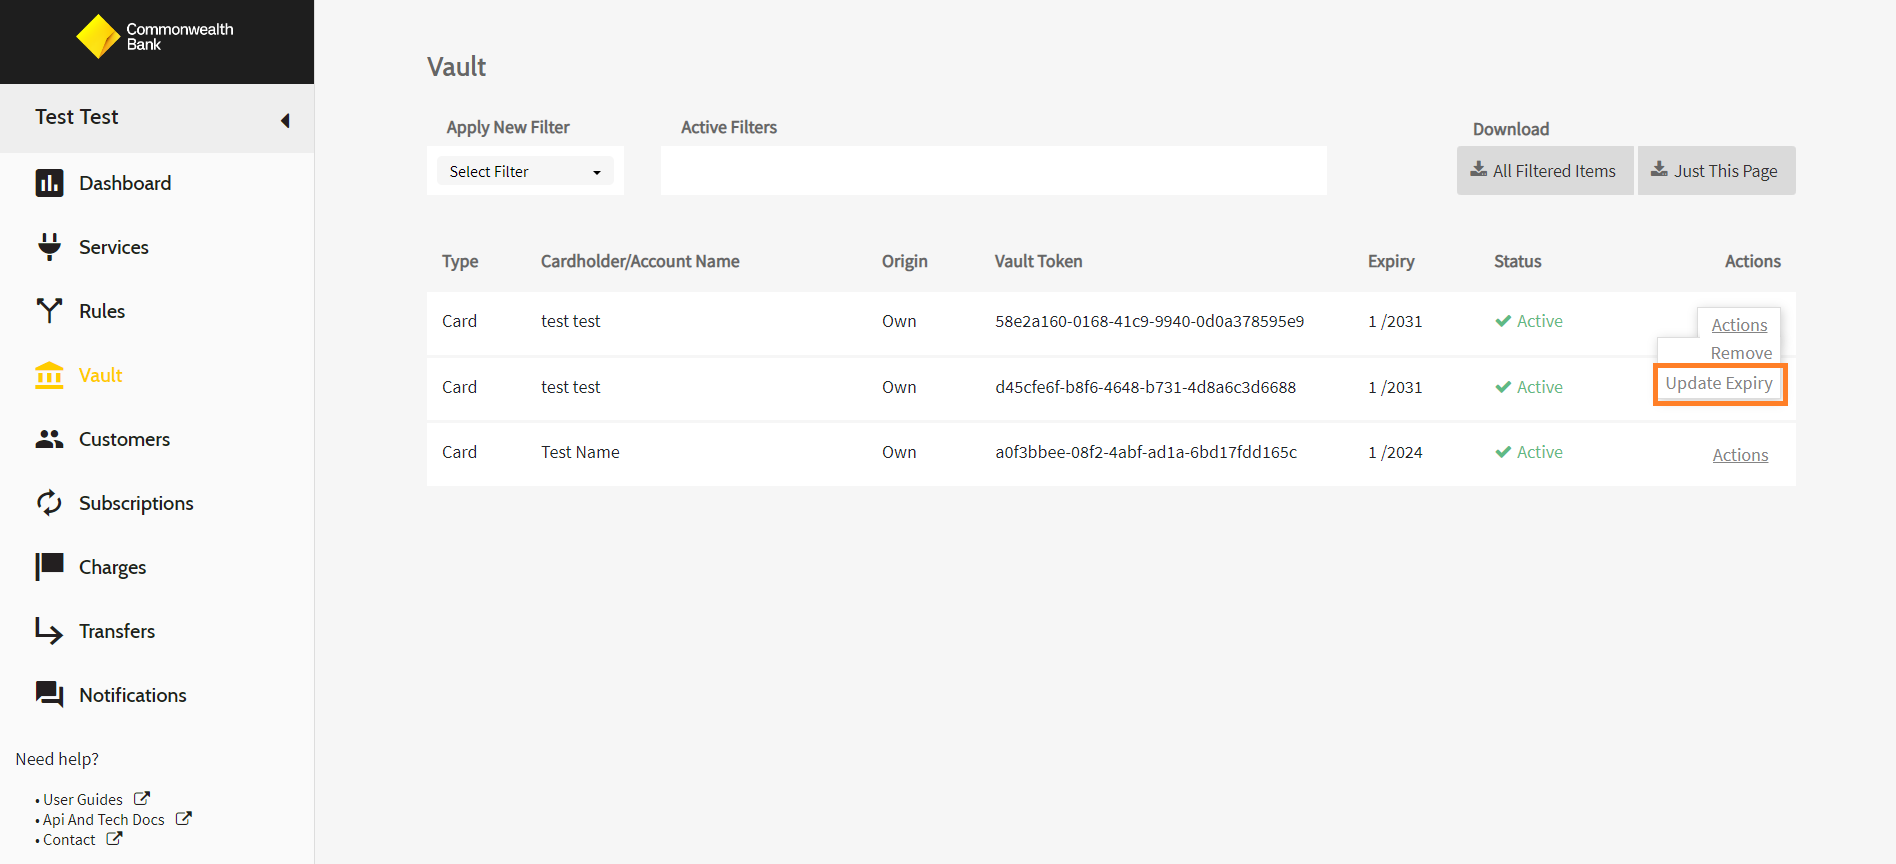
Update Expiry of Vault Tokens
To update the expiry date of Vault Tokens:
- Go to Vault > Actions > Update Expiry for the specified template. You can use the filter option or browse the list.
- Insert new Expiry Month and Expiry Year
- Confirm with Update.
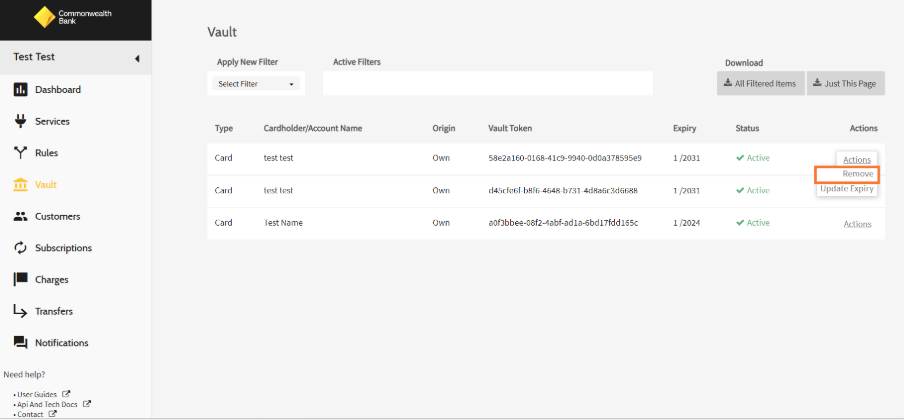
Remove Vault Tokens
To remove the Vault Tokens:
- Go to Vault > Actions > Remove for the specified token. You can use the filter option or browse the list.
- Confirm with Remove.
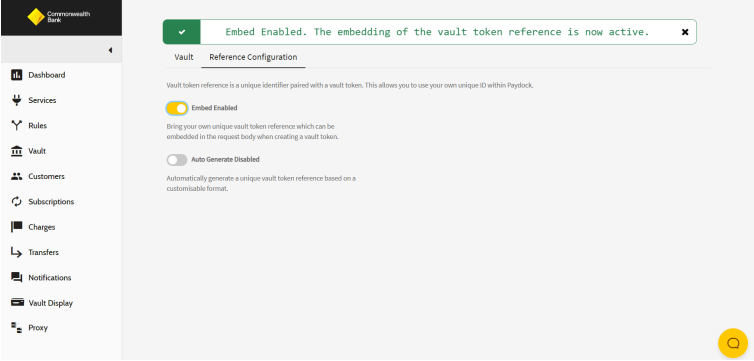
Embed
Enable the manual embedding of unique vault token references during the creation of a vault token.
To enable embed, follow the below steps:
-
Go to Vault > Reference configuration.
-
Click on the 'Embed Disabled' toggle. It will change to 'Embed Enabled.
-
A success message confirms the action.
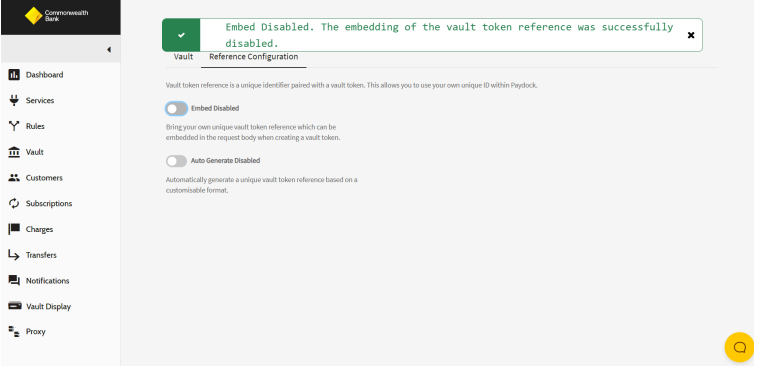
To disable Embed, follow the below steps:
-
Go to Vault > Reference Configuration.
-
Click the 'Embed Enabled' toggle. It will revert to 'Embed Disabled.
-
A message confirms the embedding is disabled.
Auto Generate
Configure your PowerBoard account to automatically generate vault token references in a specific format.
For further information on the formats available please see the Managing your tokens section.
The auto generate function works for cards only.
To enable auto generate, follow the below steps:
-
Go to Vault > Reference Configuration
-
Click on the 'Auto Generate Disabled' toggle. It will change to 'Auto Generate Enabled.
-
A Pop-up appears with options to Cancel or Proceed. Click Proceed.
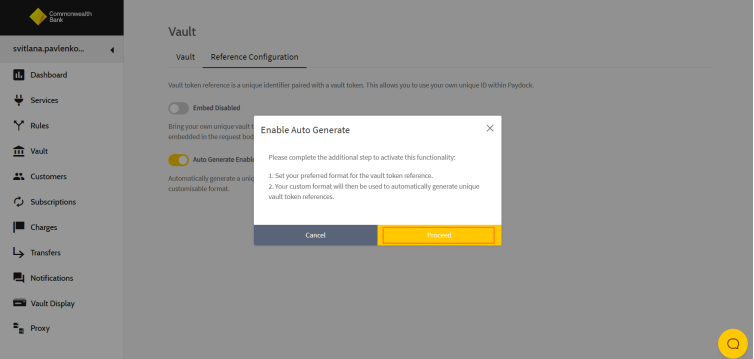
-
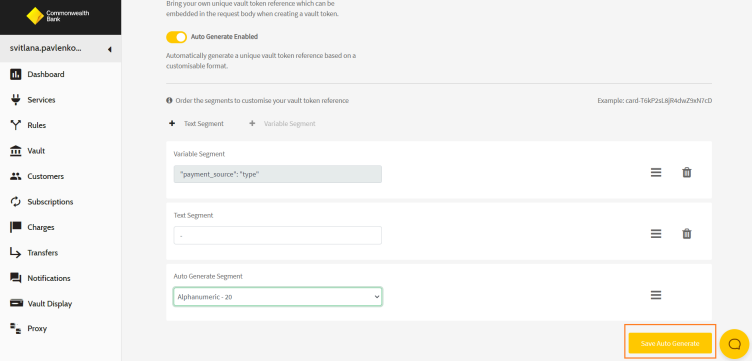
Configure the following:
-
Auto Generate Segment: Required for Auto-generation, select a format from the dropdown list.
-
Add Variable Segment: Predefined options showing payment source type.
-
Add Text segment: Use as a divider or specific text in the generated part.
-
Validation for text segment: The value must be alphanumeric, and can include '_'. '-', ':', and ';'. The total number of characters for all text segments must not exceed 18 characters.

-
-
Save Configuration
-
Click 'Save Auto Generate'. A confirmation message appears upon successful saving.
-
Definitions:
- Auto Generate – Automatically generates a unique vault token reference based on
a customizable format.
Updating Auto Generation Configuration:
-
Go to Vaults > Reference Configuration.
-
Update fields and click 'Update Auto Generate.

Disabling Auto Generation:
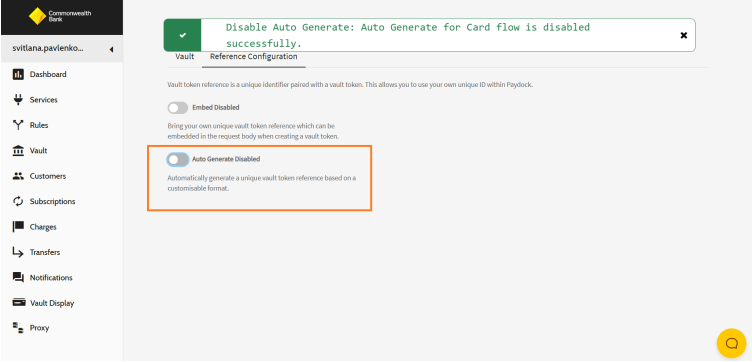
-
Go to Vaults > Reference Configuration
-
Click the 'Auto Generate Enabled' toggle. It will show a disabled state and hide fields for configuration.
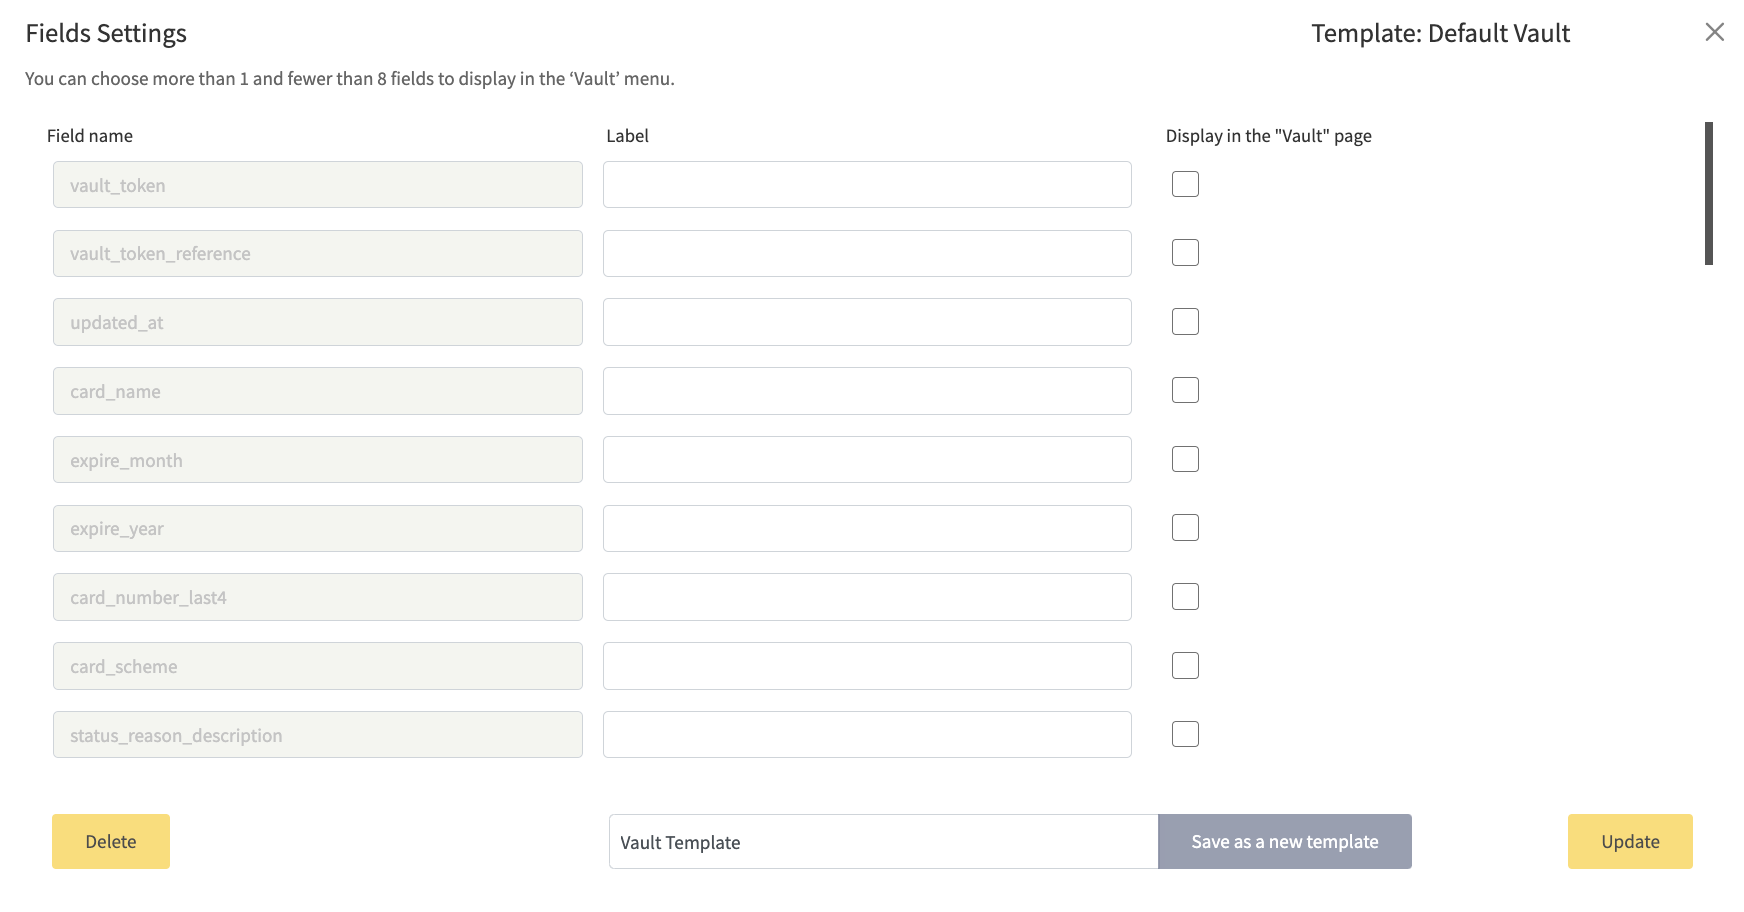
Adding Vault Template
- Go to Vaults > Settings
- Select the Field names that are required for the template. Please note up to 8 field
names can be selected. - Once the field names are selected, provide a name for the template.
- Click on Save as a new template
- To update an existing template simply add or remove a field name and click on the
update button. - To rename a template, delete the existing template or create a new template with
the required name.
Updated 4 months ago