
Notifications
Add New Notifications
Notifications inform you of all the activity on your account in real-time. Notifications can be delivered by Webhook or email and are customisable based on the Customer and a range of other parameters. For example, send receipts or alerts and trigger other business processes, such as shipping or correspondence.
To configure a new Notification:
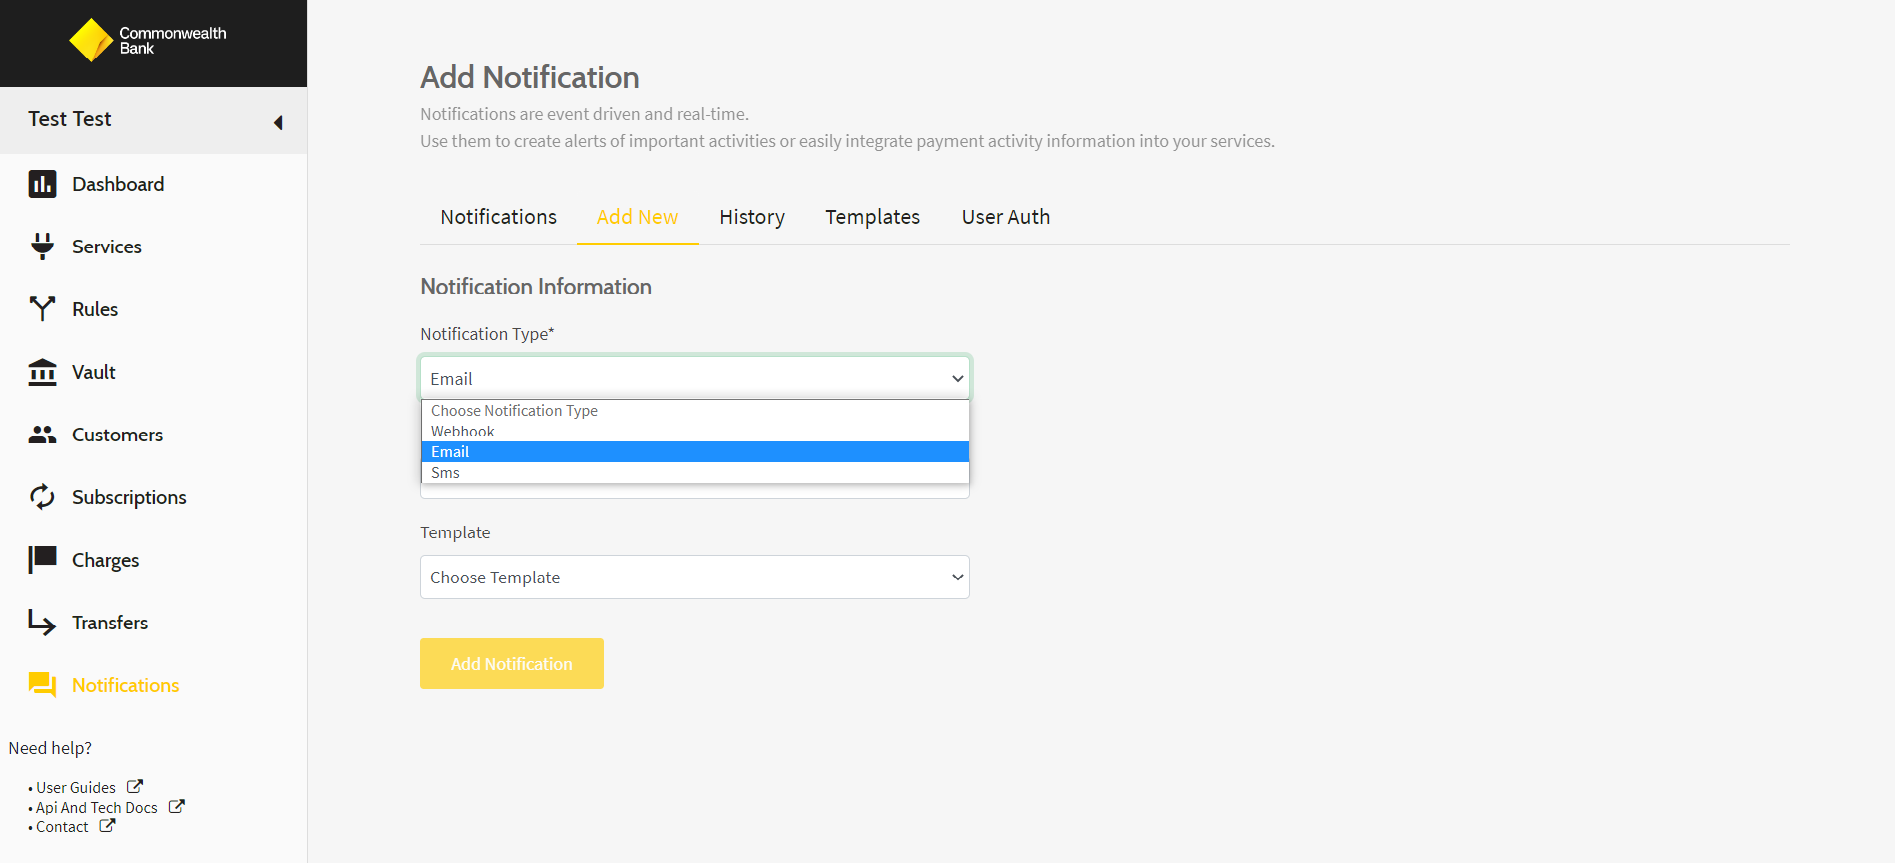
- Go to Notifications > Add New
- Select the Notification type:
a. Choose an existing Template or add a new one.
b. Fill in the Payload Destination (receiver's email address). Or click on Payer's email to pull the Payer's email address into the Notification.
c. Insert the details From (sender's email) and Subject (email's title).
d. View the Template on the right-hand side. Click on Edit Template to update it.
Webhook
a.**Choose an existing Template, add a new one or don't select a template.
b. If you mark the option Pass Transaction Payload, a Notification will be sent only for this particular event for the Transaction, not for every event.
c. Fill in the Payload Destination (receiver's URL address).
d. Select the specific service from the User Auth drop-down menu.
e.**For Sandbox environment: You can use webhook.site as a webhook receiver.
- Click Add Notification.
Notification events
Notifications inform you of all the activity on your account in real time. Notifications can be delivered by Webhook or email and are customisable based on the Customer and a range of other parameters. For example, send receipts or alerts and trigger other business processes, such as shipping or correspondence.
Here are the Notification key parameters:
- Event: a type of action on your account
- Template: a saved draft for a type of action
- Notification: communication supported by a template and triggered by an event
Notification events help diagnose any issues and act on amendments:
| Notification Event | Description |
|---|---|
| Transaction Success | a transaction has been processed successfully |
| Transaction Failure | a transaction has failed |
| Subscription Creation Success | a new subscription has been successfully created |
| Subscription Creation Failure | an attempt to create a new subscription has failed |
| Subscription Finished | a subscription plan has expired, either due to finalized recurring payments or the reached target amount |
| Subscription Updated | an existing subscription has been updated |
| Subscription Failed | a subscription payment has failed |
| Transaction by Subscription Complete | a subscription transaction has been successfully processed, separately from any one-off transactions. |
| Transaction by Subscription Failure | a subscription transaction has failed, separately from any one-off transactions. |
| Subscription Updated | a subscription has changed its amount, date, frequency, or any other element of the original plan |
| Refund Requested | a requested refund for a specified transaction |
| Refund Successful | a processed refund for a specified transaction |
| Refund Failed | a refund request has failed |
| Customer Card Expiration Warning (-1 month) | your customer’s stored card is 1 month away from expiring |
| Report Generated Successfully | a charge report has been created |
| Report Failed | a charge report request has failed |
Add new Notification Templates
To customise how you notify Customers about specific events:
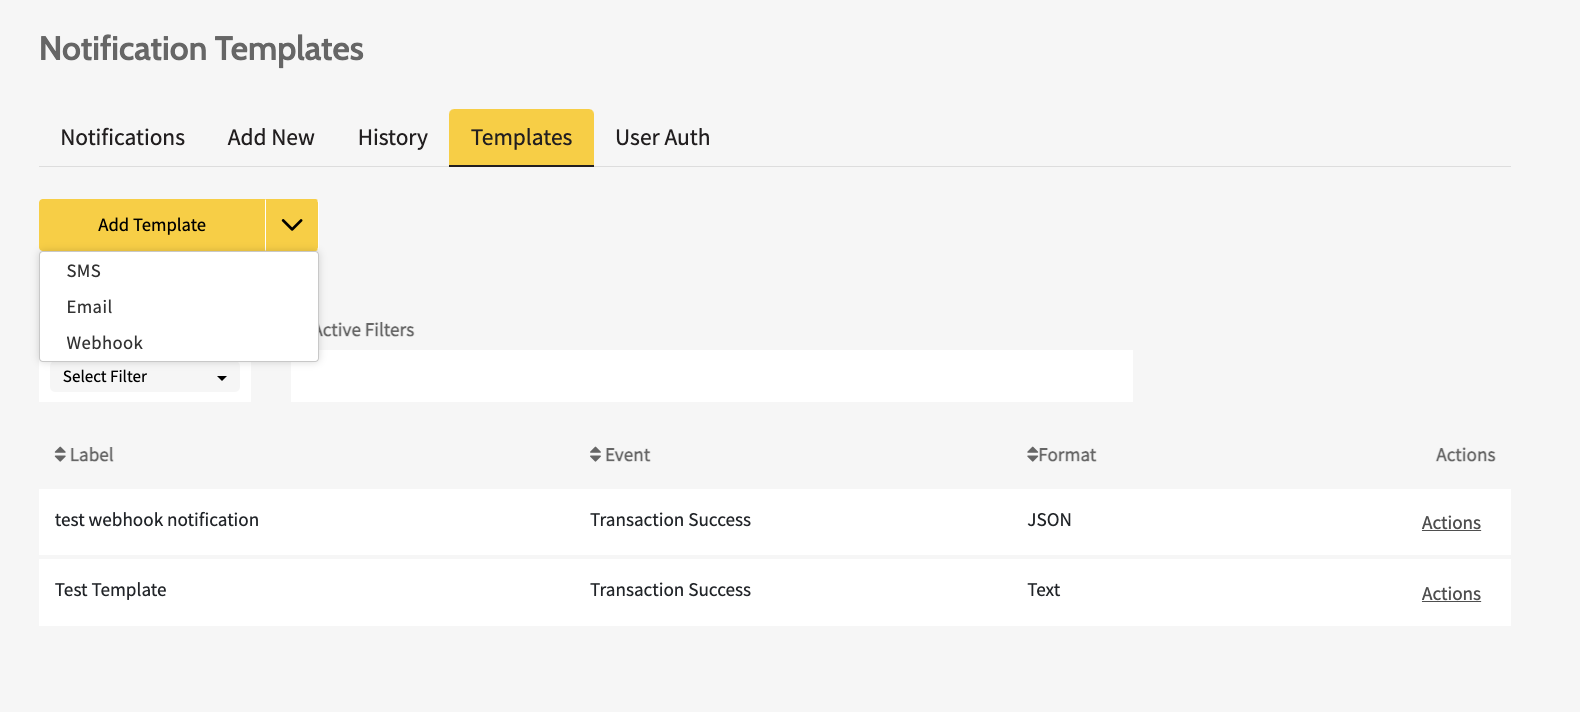
- Go to Notifications > Templates > Add Template
- Select Email, or Webhook from the drop-down menu.
Email
a. Choose between Template builder or Raw HTML.
b. Name the template in Label and choose a Notification Event from the drop-down menu.
c. Patterns - select General.
d. Logo Source URL - insert the Logo image URL address. Choose the visibility (show or hide).
e. Title - insert the email’s title in a text format. Choose the alignment (left, right, or centre).
f. Paragraph - insert the email’s main section in a text format. Choose the alignment (left, right, or centre). Click on + Add Paragraph to create an extra paragraph.
g. Footer - insert the email’s footer in a text format. Choose the alignment (left, right, or centre).
h. Use Variables, all related to the event, to automatically insert specified information. Copy the Variables by clicking on them and paste them into the Title/Paragraph/Footer sections.
i. Check the template’s format in Preview (HTML) space on the right-hand side.
j. Select Save Template.
Webhook
a. Name the template in Label and choose a Notification Event from the drop-down menu.
b. Use Variables, all related to the event, to automatically insert specified information. Copy the Variables by clicking on them.
c. Check the template’s format in Preview space on the right-hand side.
d. Select Save Template.
Refer to the below for a sample Raw HTML template
<!DOCTYPE html>
<html lang="en">
	<head>
		<meta charset="utf-8" />
		<meta name="viewport" content="width=device-width, initial-scale=1" />

		<!-- Invoice styling -->
		<style>
			body {
				font-family: 'Helvetica Neue', 'Helvetica', Helvetica, Arial, sans-serif;
				text-align: center;
				color: #777;
			}

			body h1 {
				font-weight: 300;
				margin-bottom: 0px;
				padding-bottom: 0px;
				color: #000;
			}

			body h3 {
				font-weight: 300;
				margin-top: 10px;
				margin-bottom: 20px;
				font-style: italic;
				color: #555;
			}

			body a {
				color: #06f;
			}

			.invoice-box {
				max-width: 800px;
				margin: auto;
				padding: 30px;
				border: 1px solid #eee;
				box-shadow: 0 0 10px rgba(0, 0, 0, 0.15);
				font-size: 16px;
				line-height: 24px;
				font-family: 'Helvetica Neue', 'Helvetica', Helvetica, Arial, sans-serif;
				color: #555;
			}

			.invoice-box table {
				width: 100%;
				line-height: inherit;
				text-align: left;
				border-collapse: collapse;
			}

			.invoice-box table td {
				padding: 5px;
				vertical-align: top;
			}

			.invoice-box table tr td:nth-child(2) {
				text-align: right;
			}

			.invoice-box table tr.top table td {
				padding-bottom: 20px;
			}

			.invoice-box table tr.top table td.title {
				font-size: 45px;
				line-height: 45px;
				color: #333;
			}

			.invoice-box table tr.information table td {
				padding-bottom: 40px;
			}

			.invoice-box table tr.heading td {
				background: #eee;
				border-bottom: 1px solid #ddd;
				font-weight: bold;
			}

			.invoice-box table tr.details td {
				padding-bottom: 20px;
			}

			.invoice-box table tr.item td {
				border-bottom: 1px solid #eee;
			}

			.invoice-box table tr.item.last td {
				border-bottom: none;
			}

			.invoice-box table tr.total td:nth-child(2) {
				border-top: 2px solid #eee;
				font-weight: bold;
			}

                    img {
  display: block;
  width: 60%;
  margin: auto;
}

			@media only screen and (max-width: 600px) {
				.invoice-box table tr.top table td {
					width: 100%;
					display: block;
					text-align: center;
				}

				.invoice-box table tr.information table td {
					width: 100%;
					display: block;
					text-align: center;
				}
			}
		</style>
	</head>

	<body>
        <div style="text-align: center;"> <h3>EXAMPLE  INVOICE</h3></div>
		<div class="invoice-box">
			<table>
				<tr class="top">
					<td colspan="2">
						<table>
							<tr>
								<td>
									Policy #: {{CHARGE_REFERENCE}}<br />
									Created: {{CREATED_AT}}<br />
								</td>
							</tr>
						</table>
					</td>
				</tr>

				<tr class="information">
					<td colspan="2">
						<table>
							<tr>
								<td>
									<b>PowerBoard Insurance</b><br />
									11 Harbour Street<br />
									Sydney, NSW, 2000
								</td>

								<td>
									{{FIRST_NAME}} {{LAST_NAME}}<br />
									{{EMAIL}}
								</td>
							</tr>
						</table>
					</td>
				</tr>
                                 <tr class="heading">
					<td>Item</td>

					<td>Price</td>
				</tr>

				<tr class="item">
					<td>Example Insurance Policy</td>

					<td>${{AMOUNT}}.00</td>
				</tr>
				<tr class="total">
					<td></td>

					<td>Total: ${{AMOUNT}}.00</td>
				</tr>
			</table>
		</div>
	</body>
</html>
Edit Notification Templates
To edit the Notification Templates:
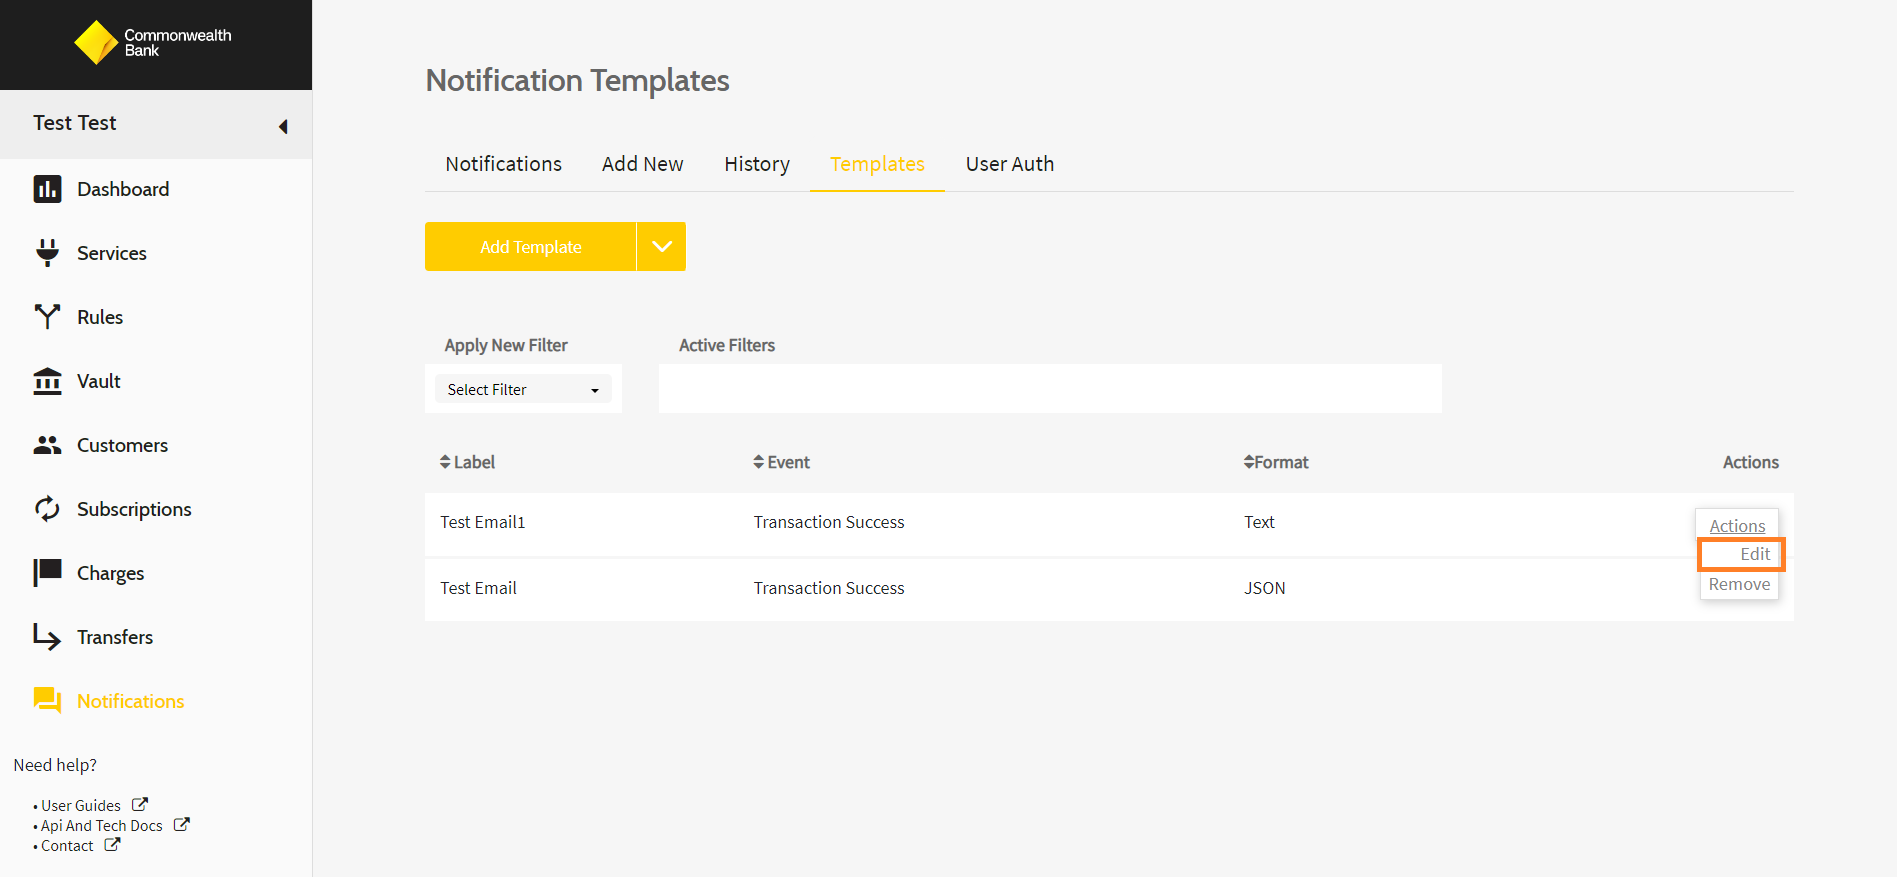
- Go to Notifications > Templates > Actions > Edit for the specified template. You can use the filter option or browse the list.
- Make changes and click Update Template.
Test Notifications
To test a Notification:
-
Go to Notifications > Actions > Test for the specified notification.
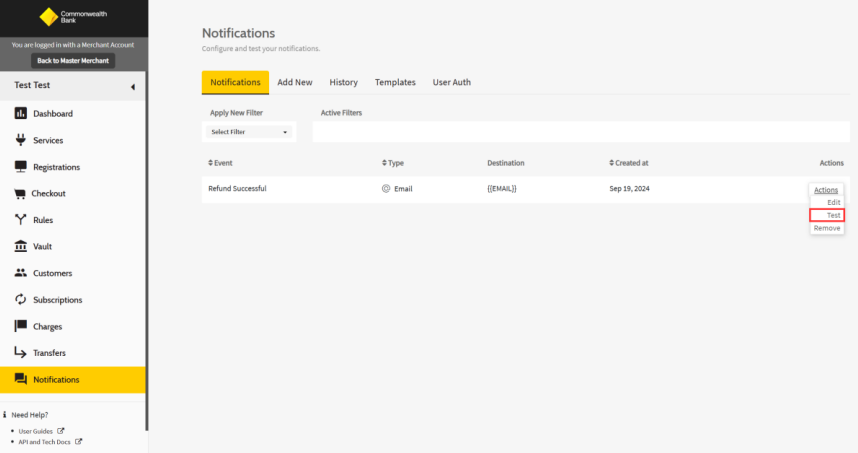
Note: Test button only check the status of the notification. It will not send the notification to either email or webhook.
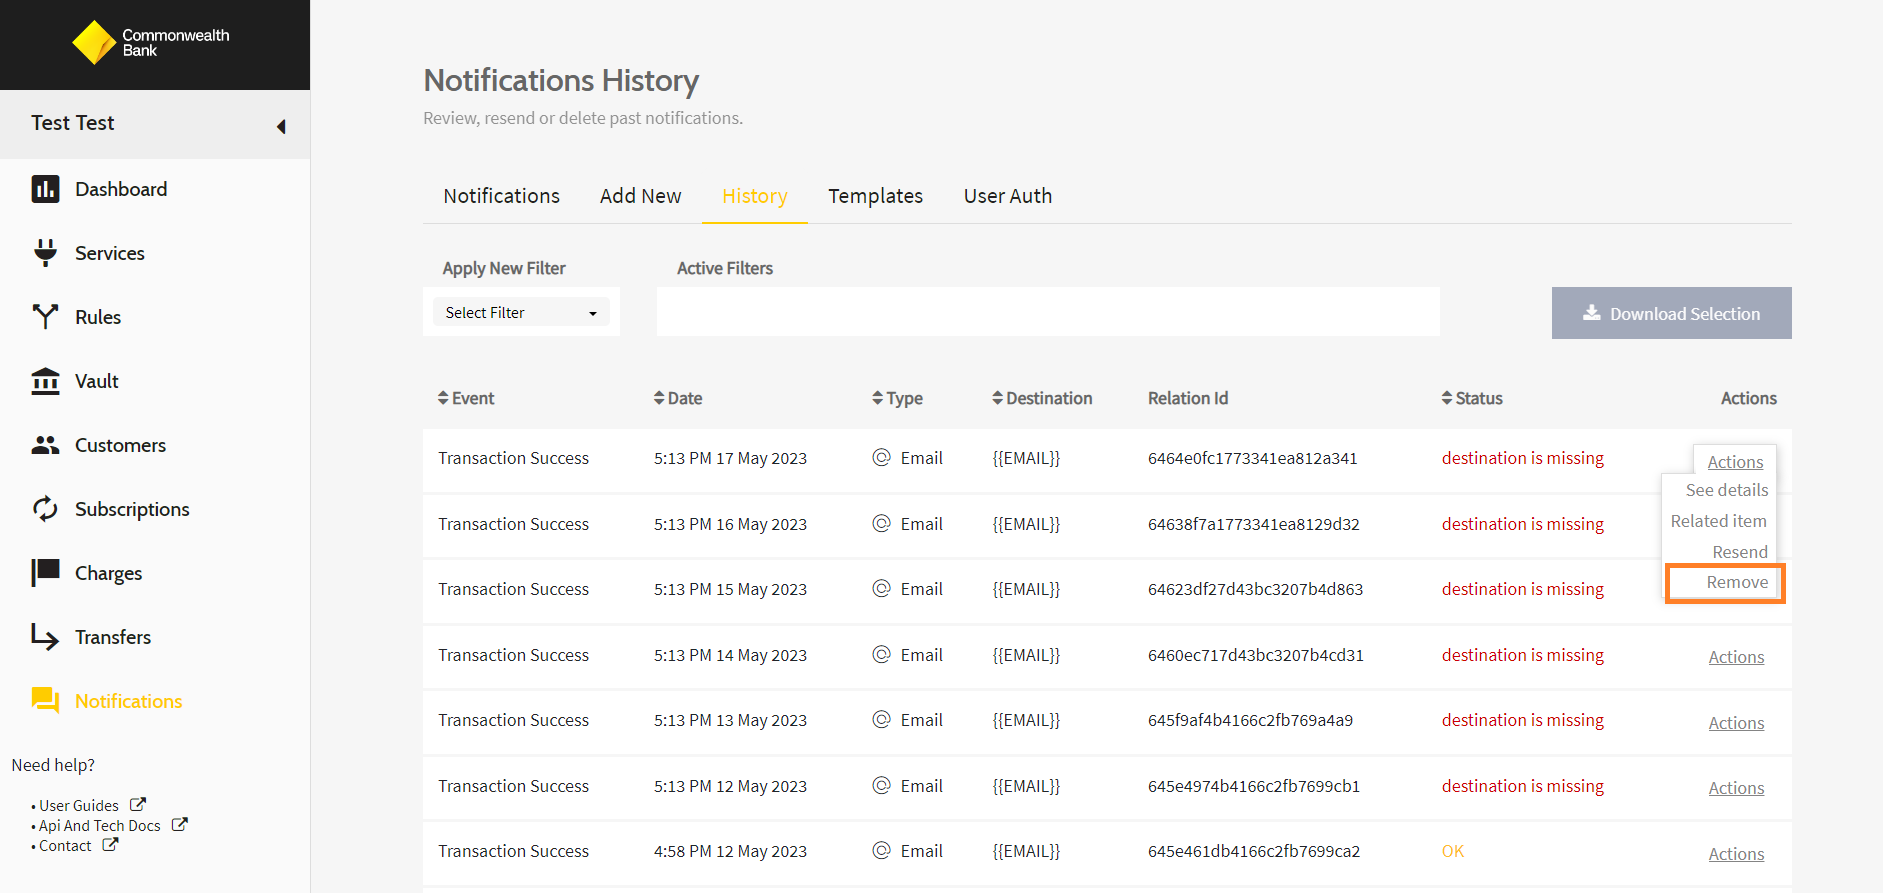
Remove Notifications
To remove a Notification:
- Go to Notifications > Notifications > Remove
- Confirm with Delete

OR
- Go to Notifications> History > Remove for the specified Notification. You can use the filter option or browse the list
- Confirm with OK.
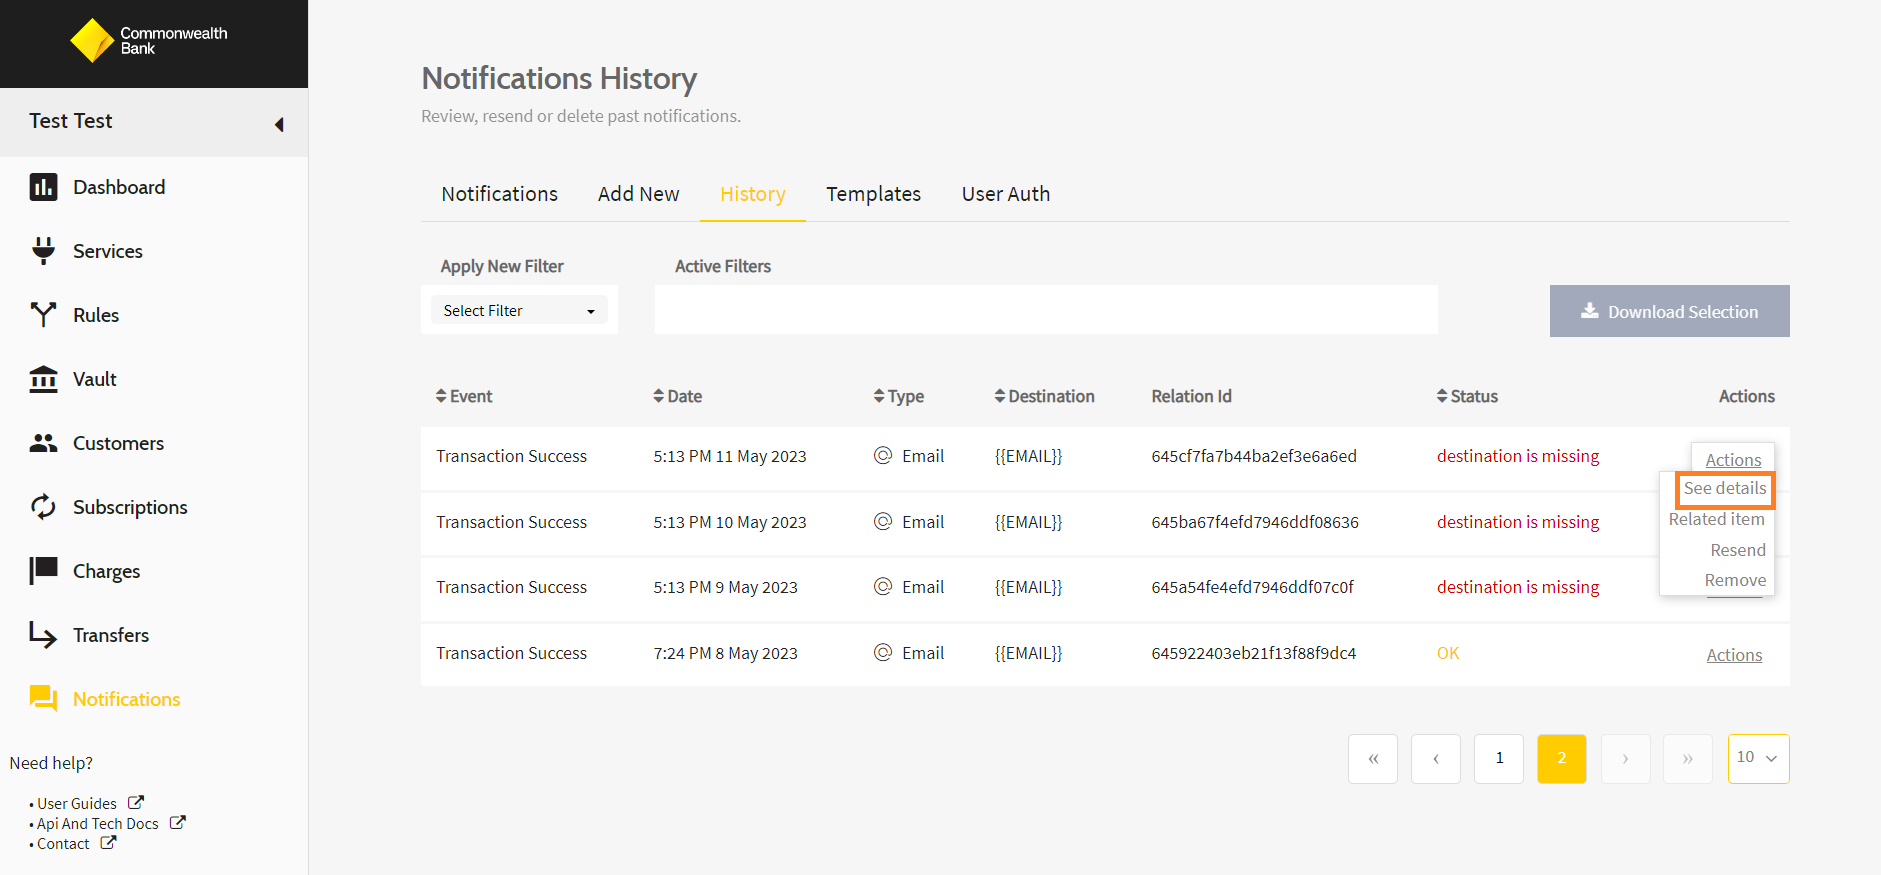
Notification History
To review the history of sent Notifications:
- Go to Notifications> History > Actions > See Details for the specified Notification. You can use the filter option or browse the list.
Here are the Notification's key parameters:
- Notification Event ID - the Event ID of the Notification.
- Parent ID - the Parent ID of the Notification. For a re-sent Notification, it will show the ID of the Initial Notification. For an Initial Notification, the value will be blank.
- Notification ID - the ID of the Notification.
- Created - the time and date of creation of the Notification.
- Event - the name of the Event (e.g. Transaction Success or Subscription Failed).
- Type - the type of Notification (Email or Webhook).
- Status - the status of the Notification (e.g. Success or Failure).
- Response status - the status of the network response (e.g. OK or 404).
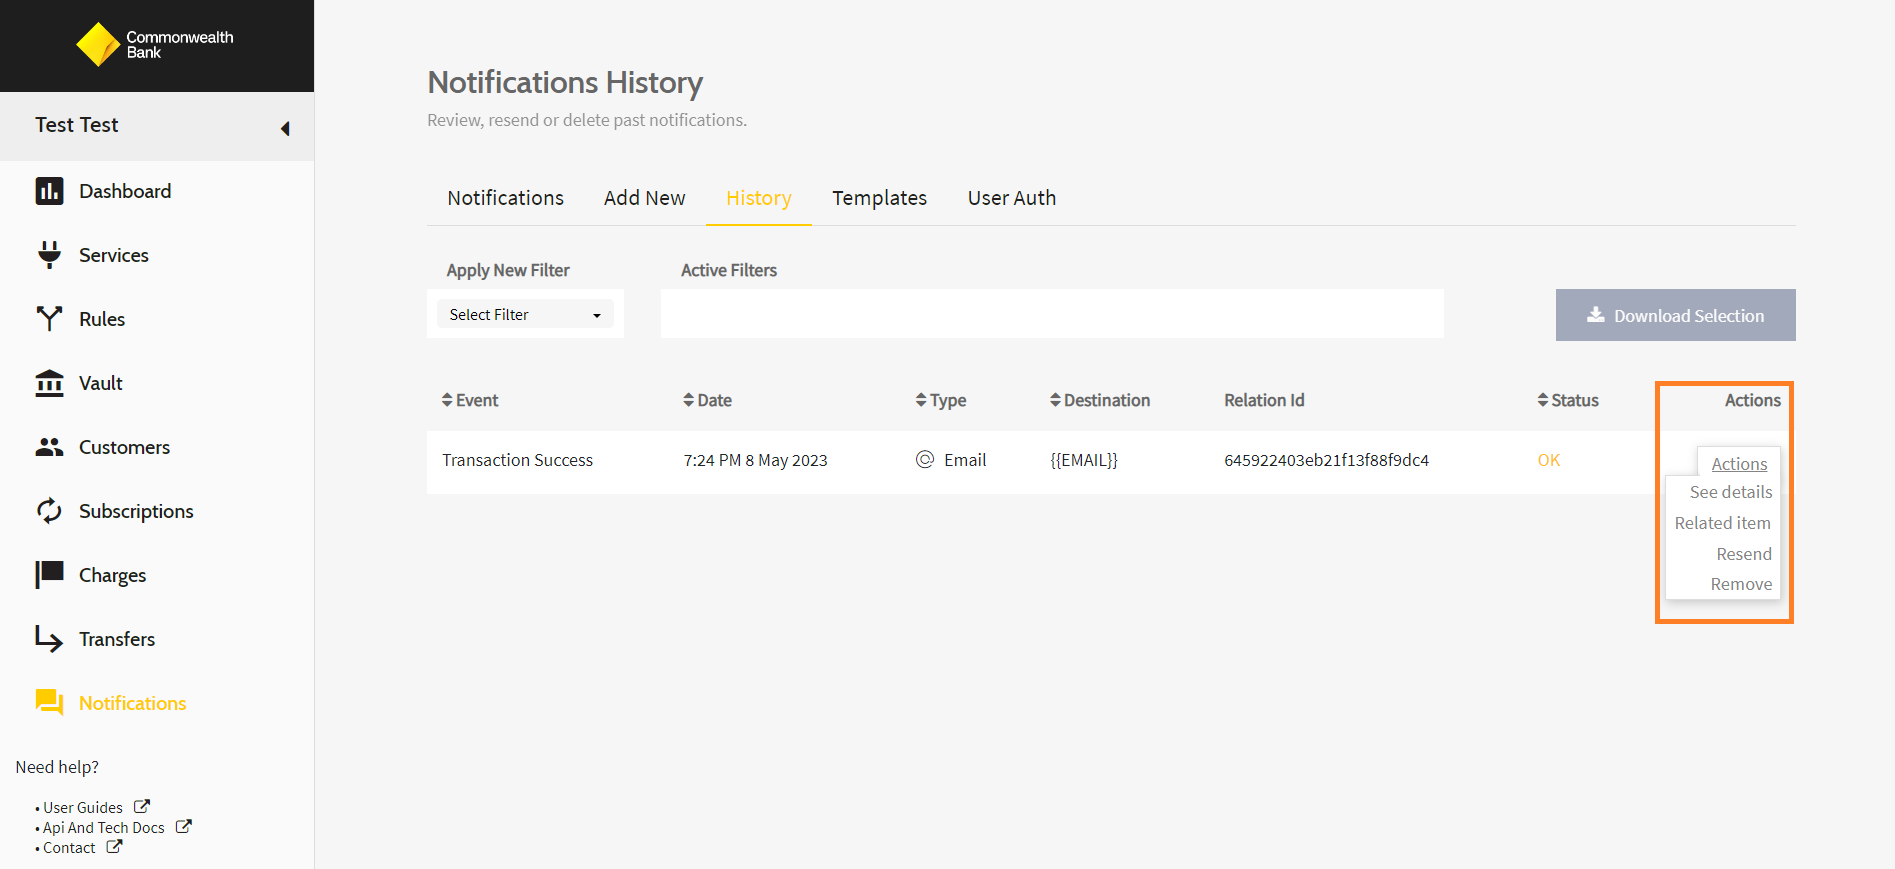
View Related Charge or Subscription to Notifications
To review the Charge or Subscription related to the particular Notification:
- Go to Notifications> History > Actions > Related Item for the specified Notification. You can use the filter option or browse the list.
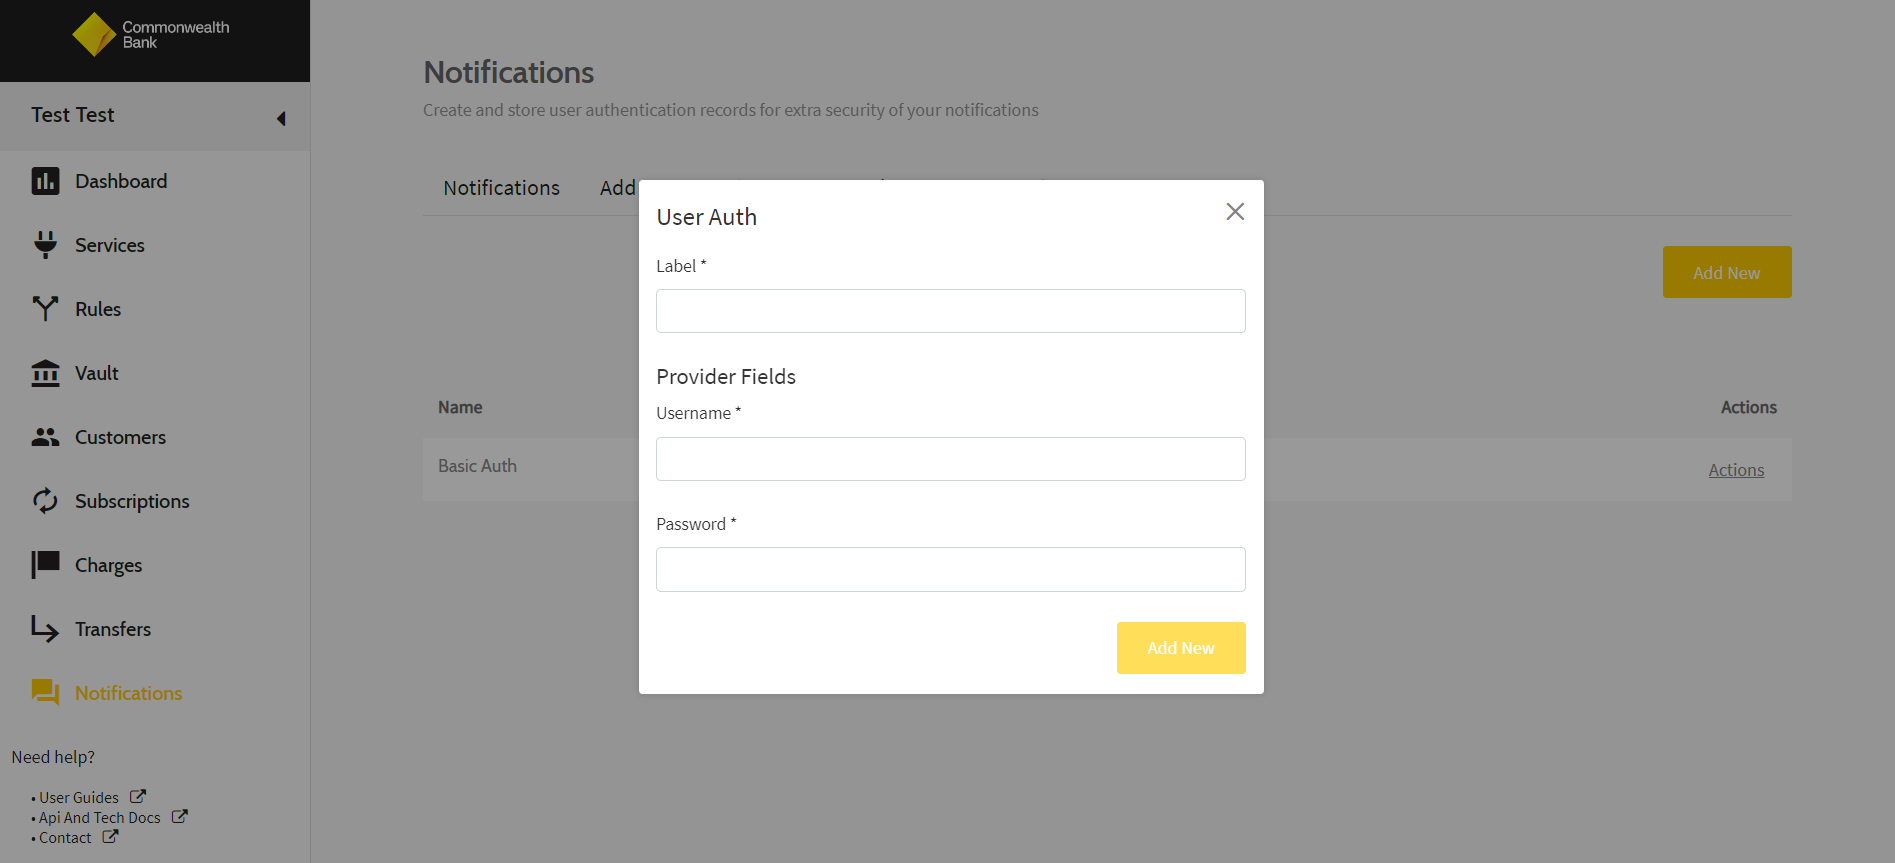
Setup User Authentication
The User Authentication feature elevates your account's security by supporting Basic Authentication protocols for encoding webhook headers. The authorisation header is passed through a username and password in the Webhook notifications.
The authentication works by prompting a Web site visitor for a username and password. You can connect to 'Mulesoft', where Basic Auth is a must for receiving HTTPS POST requests.
To set up a new User Authentication:
- Go to Notifications> User Auth > Add New
- Fill out the name under the Label, the Username and the Password
- Click Add new.
Edit User Authentication
To edit an existing User Authentication:
- Go to Notifications > User Auth > Actions > Edit Details for the specified user authentication
- Click Edit Details
- Press Confirm.
Note: The update will affect all related notifications
Updated 4 months ago