
SFTP Reporting
Before you beginYou will need:
- Public and private key for your SFTP client
Setting up the SFTP service in the PowerBoard dashboard.
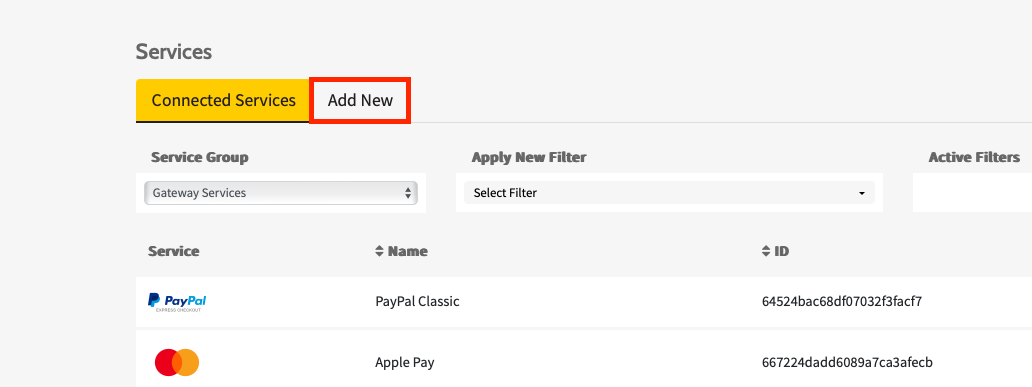
- Login to the PowerBoard dashboard.
- Navigate to the Services tab and select the Add New tab at the top.
-
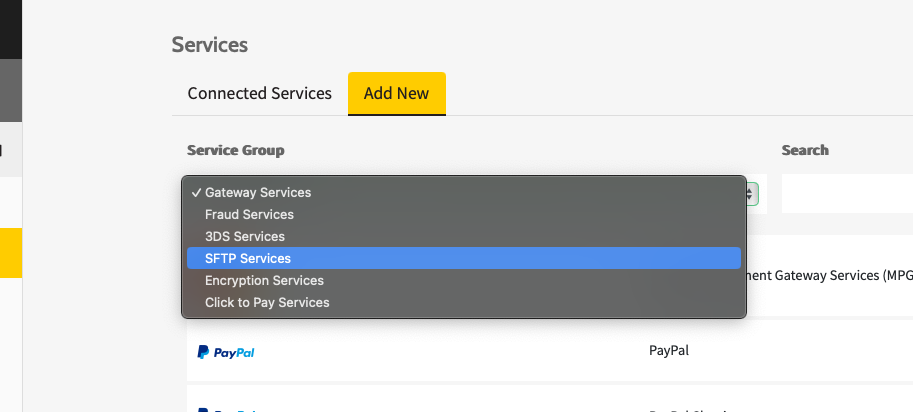
Select SFTP service from the Services dropdown
-
Select the Internal SFTP option and click Activate. This will prompt you to provide a label for the service.
-
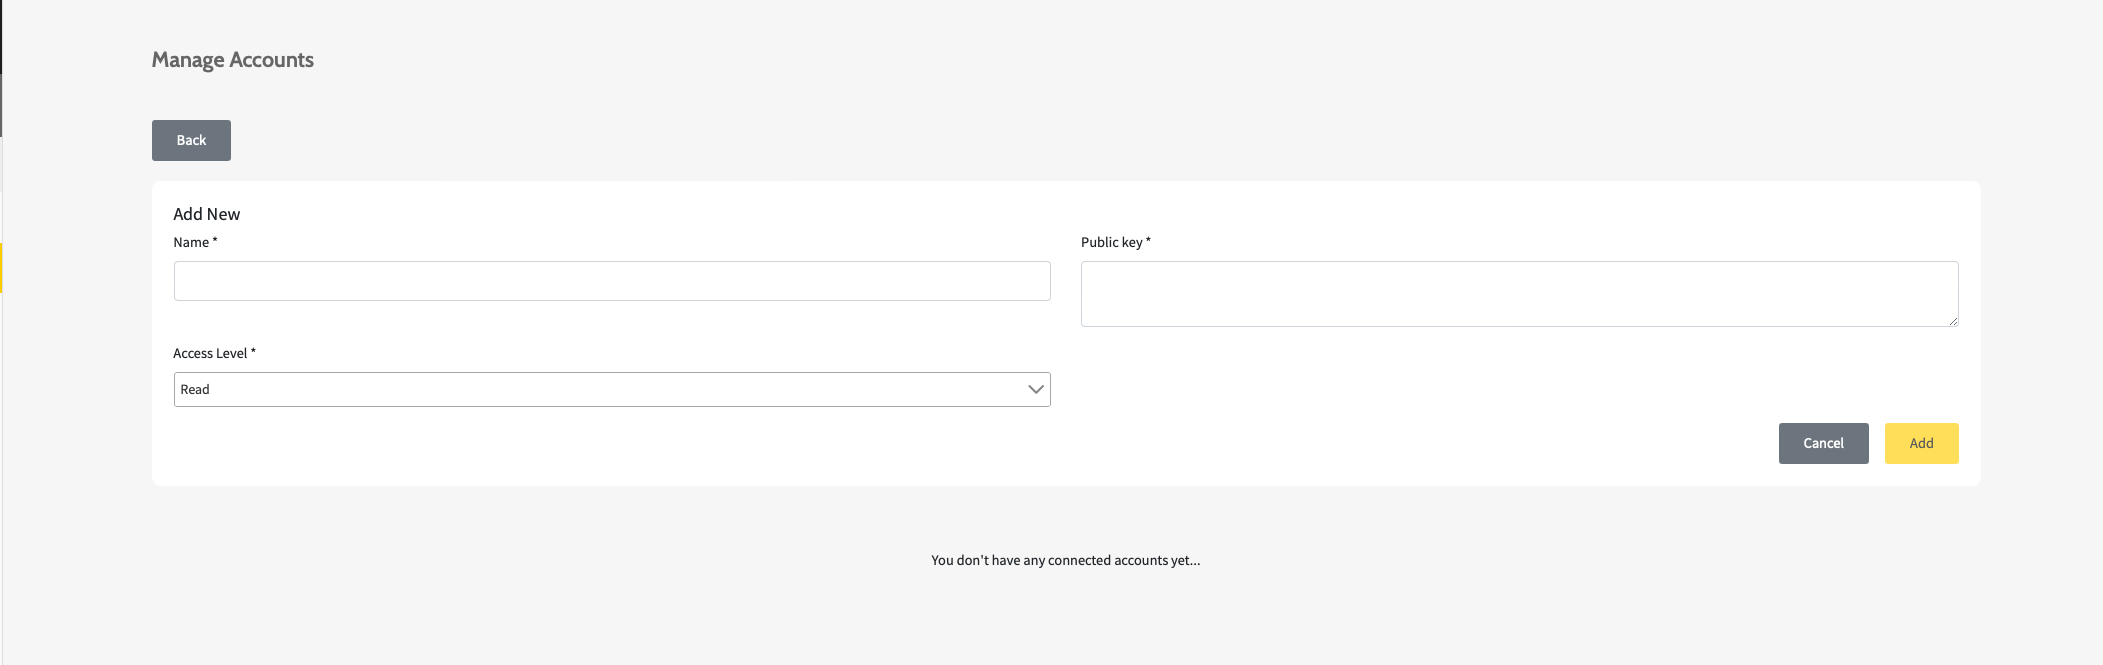
Navigate to SFTP services from the dropdown and on the right of the newly created service click Actions and then Manage Accounts. You will need to create a username to access the service to retrieve the reports.
-
Click the Create New button at the top of the page to create an account.
-
Provide the account with a Name, and Public Key. This will be the public key that is linked to your SFTP clients Private key. Then click Add.
-
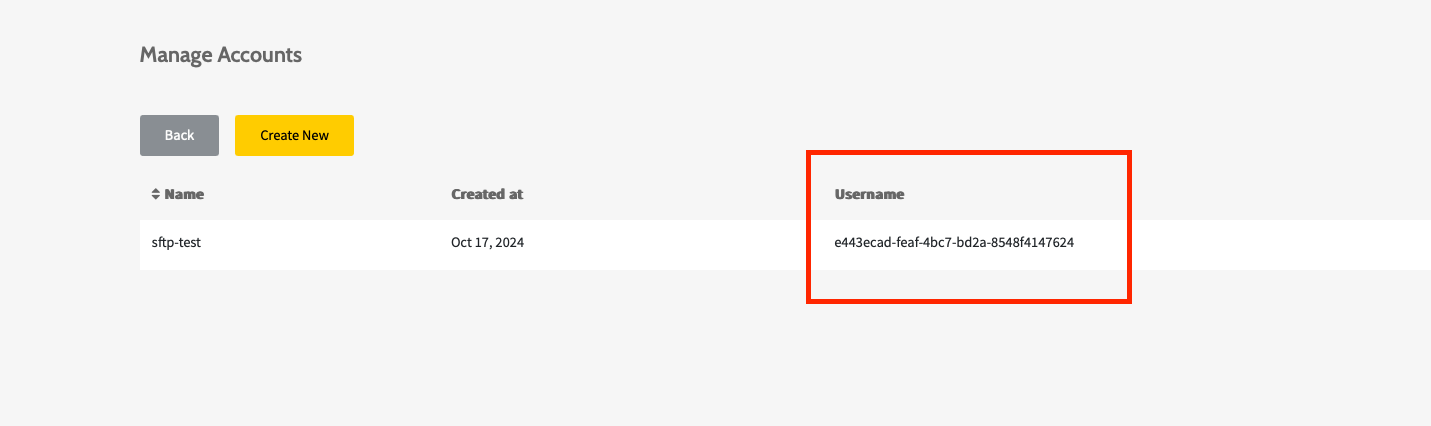
Once this is created, take note of the Username provided. You will need this to connect to the PowerBoard SFTP server.
NOTE: The username created after you create a new user is what is needed to connect to the SFTP server, not the name provided.
Configuring PowerBoard reports to be sent via SFTP
-
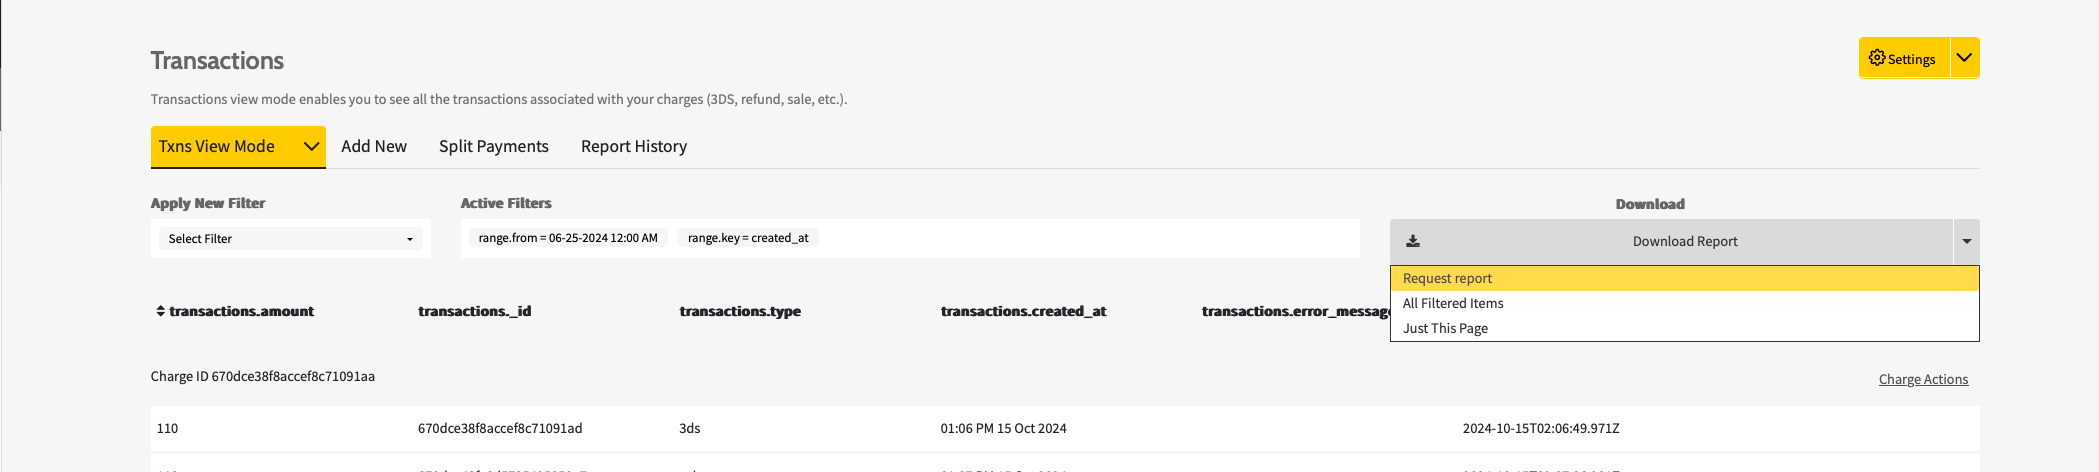
Navigate to the Charges section within the Powerboard portal
-
Select Request Report from the Dropdown in the top right corner.
-
In the Destinations section of the report setup, select via SFTP and select the SFTP service you've configured earlier.
-
Complete all other required fields and save the report. You should now be able to see it as Active in the Report History tab.
Connecting to the PowerBoard SFTP server
Using your preferred SFTP client, connect to the below hostname using your setup credentials:
Preproduction: Hostname: sftp.preproduction.powerboard.commbank.com.au
Production: Hostname: sftp.powerboard.commbank.com.au
Port: 22
Ensure you use the username you created earlier when setting up the SFTP service and authorisation is done with the private key linked with the public key used when creating the account.
Once you have connected and logged in successfully, you will find the reports in the root directory.
Updated 4 months ago